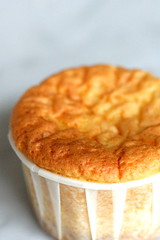
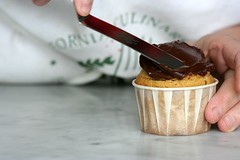
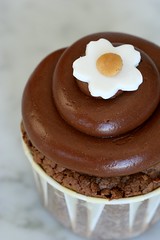
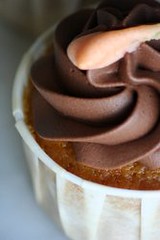
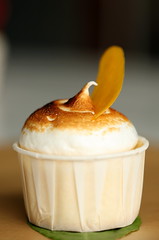
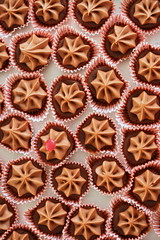
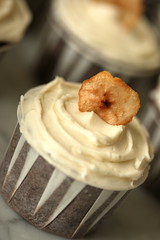
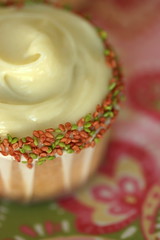
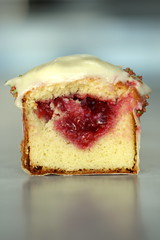
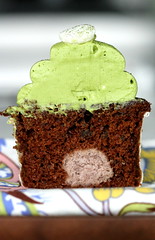
Adzuki Bean Paste Filled Chocolate Cupcakes with Matcha Green Tea Frosting
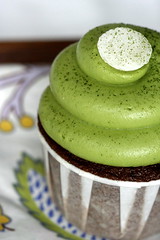
This combination was swiped right off of the menu of a restaurant I ate at last week. The dessert was green tea ice cream with warm chocolate sauce, adzuki bean, and mochi. Interestingly, I had used all the components (minus the mochi) in various cupcakes so it was just a matter of “cut and paste” with some tweaks. I really liked the combination in the ice cream dessert and it totally works as a cupcake, too. All around tasty treat for sure. I doubled up on the matcha in the frosting this time around. I wanted to really taste it… Hence the very deep green color.
And just a heads up, I have been itching to do a post about frostings. Why I have a handful of different chocolate ganache frostings and why I use a certain recipe at a certain time… Why I have a couple different cream cheese based frostings… Etc. A few people have asked me about this and I think it’s an interesting topic anyway. I am hoping to have ample time to explore various recipes over the Thanksgiving holiday. I doubt I will post next weekend as its my birthday and I do not plan on baking my own cake this year…
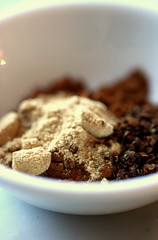
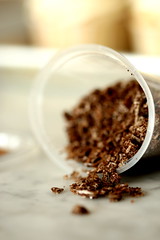
Red Bean Paste
1-1/4 cups red adzuki beans
2 tablespoons vegetable oil
1/2 cup sugar
1. Cover beans in cold water and soak uncovered, overnight.
2. Drain, transfer back to the pot and cover in 5 cups of cold water. Bring to a boil and simmer for about 1 hour and 15 minutes.
3. Drain and puree with a hand blender or in a food processor.
4. Press through a metal sieve. Note: This is time consuming work. The pureed beans become a thick paste and it takes some time to press through the sieve, clean off the underside, continue pressing until most of the bean puree passes through and the skins are left behind.
5. Heat oil in a medium saucepan over medium-high heat. Add pureed beans and sugar. Stir with a wooden spoon for about 3-5 minutes. Transfer to a bowl, cover with plastic wrap, and allow to cool.
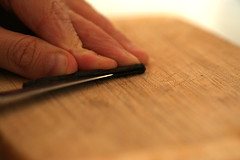
6. After the paste has cooled, scoop out 1/2″ balls. Cover loosely with plastic wrap so they won’t dry out.
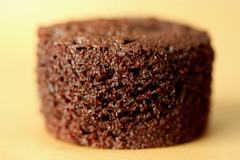
Old-Fashioned Chocolate Cupcakes
24 regular cupcakes / 350 degree oven
3/4 cup (1-1/2 sticks) butter
2 cups sugar
3 eggs
2 cups flour
1 teaspoon baking soda
1/2 teaspoon salt
3/4 cup cocoa powdered
2 tablespoons instant espresso powder
1-1/2 cups milk
2 teaspoons vanilla
1. Beat butter until softened. Add sugar and beat until light and fluffy, about 3 minutes.
2. Add eggs, one at a time, beating 30 seconds after each addition.
3. Measure the flour, baking soda, salt, cocoa powder, and espresso powder into a medium sized bowl and whisk to combine.
4. Measure the milk and vanilla into a measuring thing.
5. Add about a third of the dry ingredients to the butter/sugar and beat to combine. Add about a half of the milk/vanilla and beat to combine. Continue adding, alternating between dry and wet and finishing with the dry.
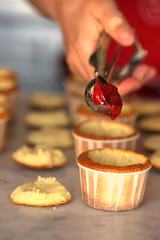
6. Scoop batter into cupcake cups about 2/3’s full. Plop a ball of bean paste in each. Push down slightly and cover with batter using the back of a spoon.
7. Bake at 350 degrees for about 25-30 minutes or until a cake tester comes out clean.
Note: Because you will be stuffing these cupcakes with bean paste, do not overfill. Stay close to 2/3s full or below. Also I like to preheat my oven to 375 then turn it down to 350 once I put the cupcakes in to make sure there are no cool spots which tend to result in cupcake overflow.
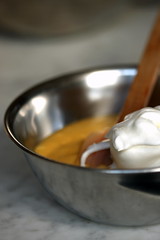
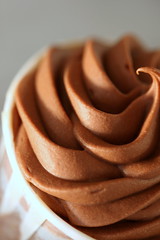
Matcha Green Tea Frosting
2 sticks butter
8 ounces or 1 package of Philly cream cheese
3 cups powdered sugar
~2 tablespoons matcha powder
1. Bring butter to room temperature by letting it sit out for 1 or 2 hours.
2. Beat butter and cream cheese at medium speed until creamy.
3. Sift 3 cups of powdered sugar and 1 tablespoon of matcha powder into the butter/cream cheese mixture and beat to combine.
4. Taste. Add more matcha if desired (I find some matcha powder is stronger then others) and more powdered sugar if its not thick enough. 3 cups worked for me.
Assemble
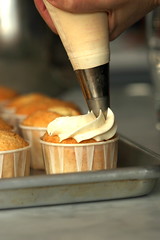
1. Top cooled cupcakes with the frosting.
2. Top with a mochi disk and a dusting of matcha.
Note: Never having made mochi before I did a quick google search and ended up with this quick method. After nuking the flour and water, I stirred it some and transfered onto a sheet of plastic wrap and formed it into a log. I left the log to cool then sliced into it with a knife and cut out circles with the end of a pastry tip. From there I dusted lightly in corn starch to prevent sticking. Note that you should keep the disks wrapped in plastic wrap until you serve the cupcakes as they go crunchy when left out in the air. The wrapped mochi held up well overnight.
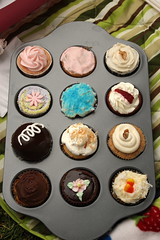
Cupcake Round-Up II: the results are in!7
The roundup results are in and there are lots of tasty looking cupcakes for you to drool over!
Here is how round-up II faired compared to the first one… There were definitely less submissions this time around, I would say a 30% drop. That is fine, we still had 39 folks participating and that is pretty good by my book. The drop in submissions was seen mostly in the chocolatey cupcakes category with spicy, fruity, and other staying pretty much the same from round-up one to two.
I could definitely see the fall influence in a lot of the recipes. And Garrett and I both so appreciate the level of creativity with some of the flavor combinations. Just peruse the list and you will see. A huge thank you to everyone who took the time to participate and spread the cupcake love.